Select Printable Area Excel
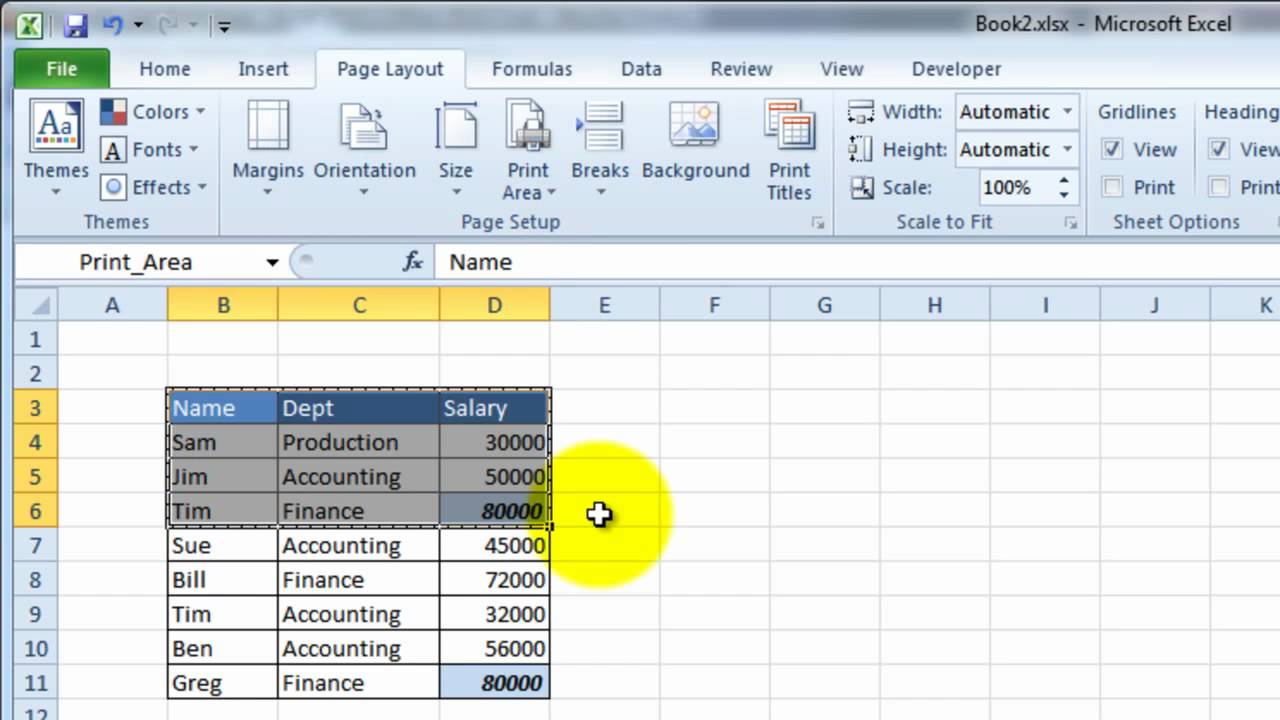
Select Printable Area Excel - Web today we’ll be talking about how to set the print area in excel. You’ve already defined or set a print area in your. Once a print area is set, add additional print areas by selecting. In the page setup group, click the print area button. Click on page layout in the top menu to open its menu ribbon. Don’t miss out a great. Set a new print area you can add a new print area in your worksheet from the page layout tab in the menubar. Click the page layout tab. Click on print area under the page setup section. Click on the 'print area' button in the 'page setup' group.
The print area is now set. Web open the excel worksheet. Once a print area is set, add additional print areas by selecting. Web go to the page layout tab. Set a new print area you can add a new print area in your worksheet from the page layout tab in the menubar. Web today we’ll be talking about how to set the print area in excel. Click on the 'print area' button in the 'page setup' group. Select the cells that you want to print. How to clear the print area. Set a print area excel saves the print area together with the workbook.
You’ve already defined or set a print area in your. Select the set print area option from the dropdown menu. As a first step, select the range of data you want to print, after that in the menu go to file > print (or use the shortcut ctrl + p ). Click on page layout in the top menu to open its menu ribbon. Don’t miss out a great. The print area is now set. This will set the selected cells as the print area. Web open the excel worksheet. Keep watching and print any part of your excel sheet without a hitch! Click set print area from the options.
VideoExcel How to manually set the print area in Excel 2010 YouTube
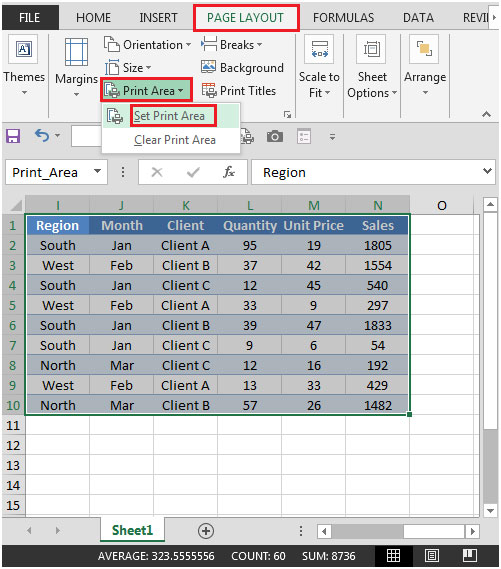
Click on page layout in the top menu to open its menu ribbon. Refer to the below screenshot. Click set print area from the options. Web go to the page layout tab. Web open the excel worksheet.

How to set Print Area in Excel YouTube
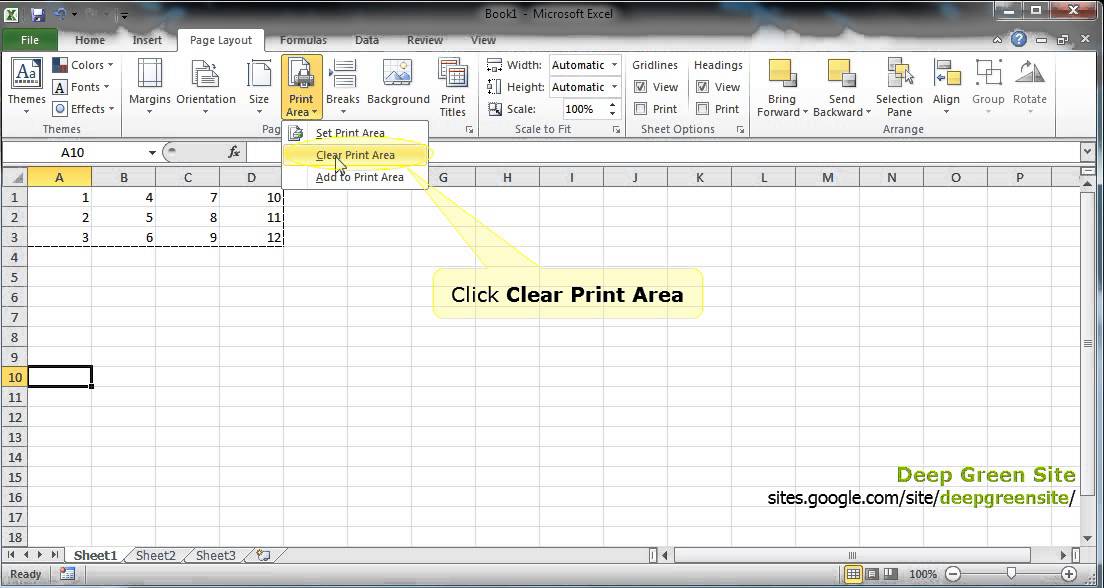
Web today we’ll be talking about how to set the print area in excel. You’ve already defined or set a print area in your. This will set the selected cells as the print area. Choose 'clear print area' to remove the. The print area is now set.
Ravi's Online Diary How to Set Print Area in excel?
Click on the 'page layout' tab. As a first step, select the range of data you want to print, after that in the menu go to file > print (or use the shortcut ctrl + p ). Click the print area button. Choose 'clear print area' to remove the. This will set the selected cells as the print area.
MS Excel 2010 / How to clear print area YouTube
Select the set print area option from the dropdown menu. Web go to the page layout tab. Once a print area is set, add additional print areas by selecting. Select the cells that you want to print. Web go to page layout.
:max_bytes(150000):strip_icc()/ExcelSetPrintArea-5c23d199c9e77c0001adc722.jpg)
How to Set Print Area in Excel
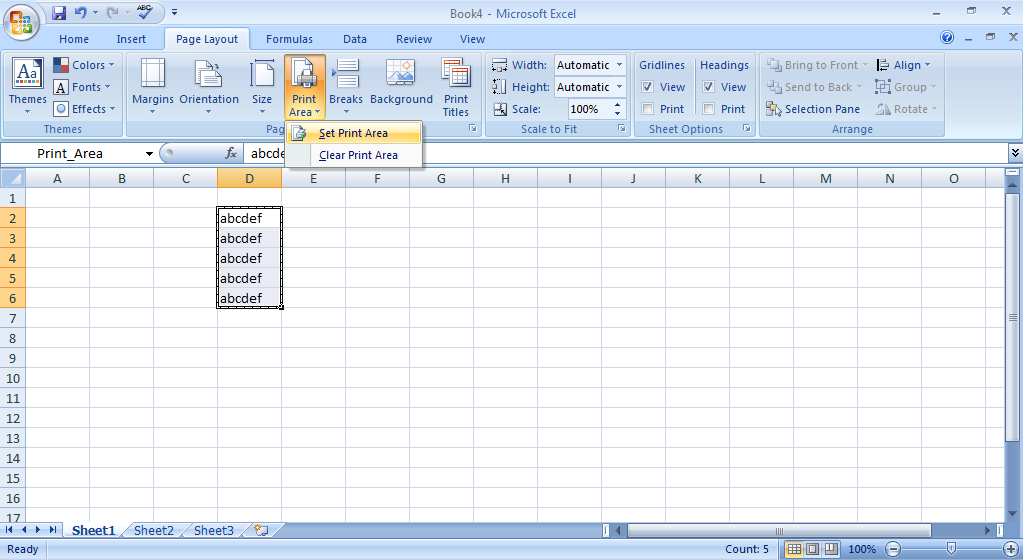
Click on the 'print area' button in the 'page setup' group. Select the set print area option from the dropdown menu. Refer to the below screenshot. Choose the add to print area option, as shown in the below. Web select the cells you want to print.
233 How to set print area in Excel 2016 YouTube
In the page setup group, click the print area button. Next, click page layout > print area > set print area. Choose 'clear print area' to remove the. Click on the 'print area' button in the 'page setup' group. Select the cells that you want to print.

How to Clear a Print Area in Excel for Office 365 Support Your Tech
On the file menu, point to print area, and then click set. Click on page layout in the top menu to open its menu ribbon. Don’t miss out a great. Web a print area is a special feature of printing in ms excel that enables the users to print specific area (a range of cells) of a worksheet. Once a.

How to Select Print Area in MS Excel एक्सेल में प्रिंट एरिया सिलेक्ट
Select the set print area option from the dropdown menu. Set a print area excel saves the print area together with the workbook. The print area is now set. Web select the range of cells you want to set as the print area. Web today we’ll be talking about how to set the print area in excel.
Identifying and Selecting the Print Area in a Sheet in Excel 2010
Next, click page layout > print area > set print area. Select the cells that you want to print. When the print command executes, only. On the file menu, point to print area, and then click set. In the page setup group, click the print area button.
:max_bytes(150000):strip_icc()/ExcelClearPrintArea-5c1c287ac9e77c000159666f.jpg)
How to Set Print Area in Excel
Select the cells that you want to print. As a first step, select the range of data you want to print, after that in the menu go to file > print (or use the shortcut ctrl + p ). Web go to the page layout tab. Set a print area excel saves the print area together with the workbook. Don’t.
Select Page Layout From The Top Menu.
Next, click page layout > print area > set print area. Click on page layout in the top menu to open its menu ribbon. Web select the range of cells you want to set as the print area. Set a new print area you can add a new print area in your worksheet from the page layout tab in the menubar.
Select The Set Print Area Option From The Dropdown Menu.
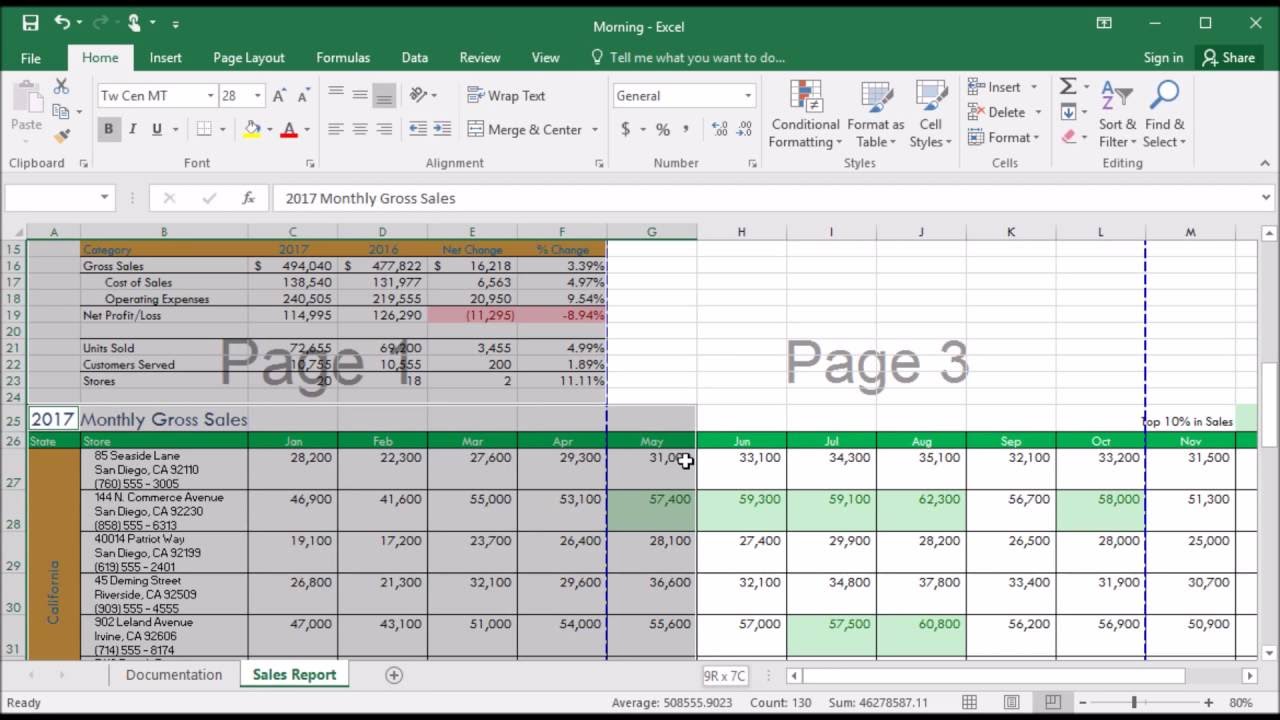
Click on the 'page layout' tab. Keep watching and print any part of your excel sheet without a hitch! Web a print area is a special feature of printing in ms excel that enables the users to print specific area (a range of cells) of a worksheet. As a first step, select the range of data you want to print, after that in the menu go to file > print (or use the shortcut ctrl + p ).
Click The Print Area Button.
Don’t miss out a great. One note, though you asked how to select. In the page setup group, click the print area button. Once a print area is set, add additional print areas by selecting.
Web Select The Cells You Want To Print.
Click the page layout tab. Choose the add to print area option, as shown in the below. Web go to page layout. Click set print area from the options.